Mocking API services in development and testing with WireMock
During local development and testing, it's quite common to encounter situations where your app is dependent on the remote APIs. Network issues, rate limits, or even downtime of the API provider can halt your progress. This can significantly hinder your productivity and make testing more challenging. This is where WireMock comes into play.
WireMock is an open-source tool that helps developers to create a mock server that simulates the behavior of real APIs, providing a controlled environment for development and testing.
Imagine you have both an API and a frontend app, and you want to test how the frontend interacts with the API. Using WireMock, you can set up a mock server to simulate the API's responses, allowing you to test the frontend behavior without relying on the actual API. This can be particularly helpful when the API is still under development or when you want to test different scenarios without affecting the actual API. WireMock supports both HTTP and HTTPS protocols and can simulate various response scenarios, including delays, errors, and different HTTP status codes.
In this guide, you'll learn how to:
- Use Docker to launch up a WireMock container.
- Use mock data in the local development without relying on an external API
- Use a Live API in production to fetch real-time weather data from AccuWeather.
Using WireMock with Docker
The official Docker image for WireMock provides a convenient way to deploy and manage WireMock instances. WireMock is available for various CPU architectures, including amd64, armv7, and armv8, ensuring compatibility with different devices and platforms. You can learn more about WireMock standalone on the WireMock docs site.
Prerequisites
The following prerequisites are required to follow along with this how-to guide:
Launching WireMock
Launch a quick demo of WireMock by using the following steps:
-
Clone the GitHub repository locally.
$ git clone https://github.com/dockersamples/wiremock-node-docker -
Navigate to the
wiremock-endpointdirectory$ cd wiremock-node-docker/WireMock acts as the mock API that your backend will communicate with to retrieve data. The mock API responses have already been created for you in the mappings directory.
-
Start the Compose stack by running the following command at the root of the cloned project directory
$ docker compose up -dAfter a moment, the application will be up and running.


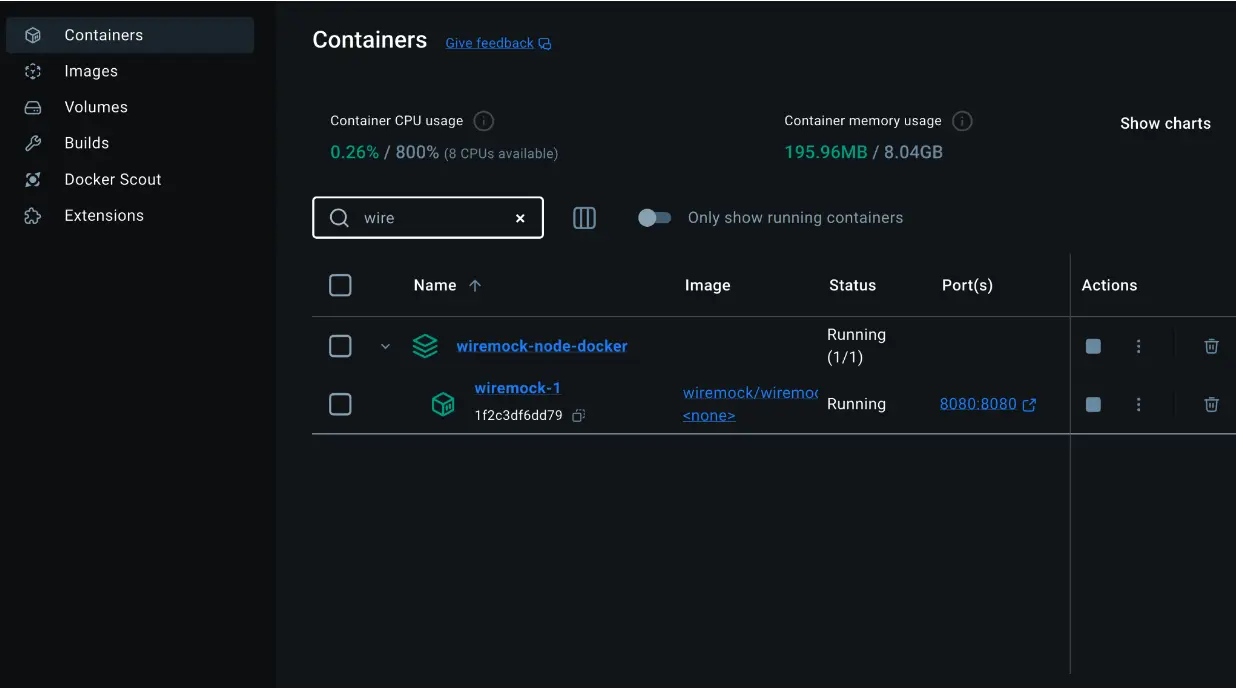
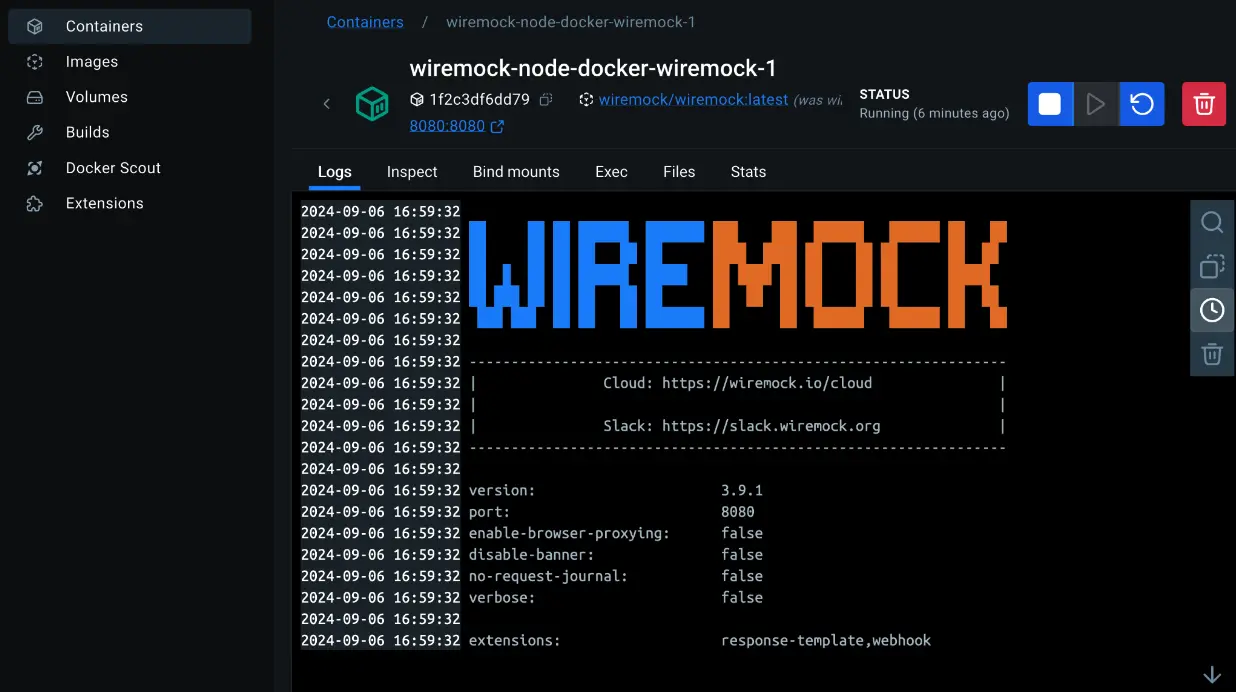
You can check the logs by selecting the
wiremock-node-dockercontainer:

-
Test the Mock API.
$ curl http://localhost:8080/api/v1/getWeather\?city\=BengaluruIt will return the following canned response with mock data:
{"city":"Bengaluru","temperature":27.1,"conditions":"Mostly cloudy","forecasts":[{"date":"2024-09-02T07:00:00+05:30","temperature":83,"conditions":"Partly sunny w/ t-storms"},{"date":"2024-09-03T07:00:00+05:30","temperature":83,"conditions":"Thunderstorms"},{"date":"2024-09-04T07:00:00+05:30","temperature":83,"conditions":"Intermittent clouds"},{"date":"2024-09-05T07:00:00+05:30","temperature":82,"conditions":"Dreary"},{"date":"2024-09-06T07:00:00+05:30","temperature":82,"conditions":"Dreary"}]}With WireMock, you define canned responses using mapping files. For this request, the mock data is defined in the JSON file at
wiremock-endpoint/mappings/getWeather/getWeatherBengaluru.json.For more information about stubbing canned responses, refer to the WireMock documentation.
Using WireMock in development
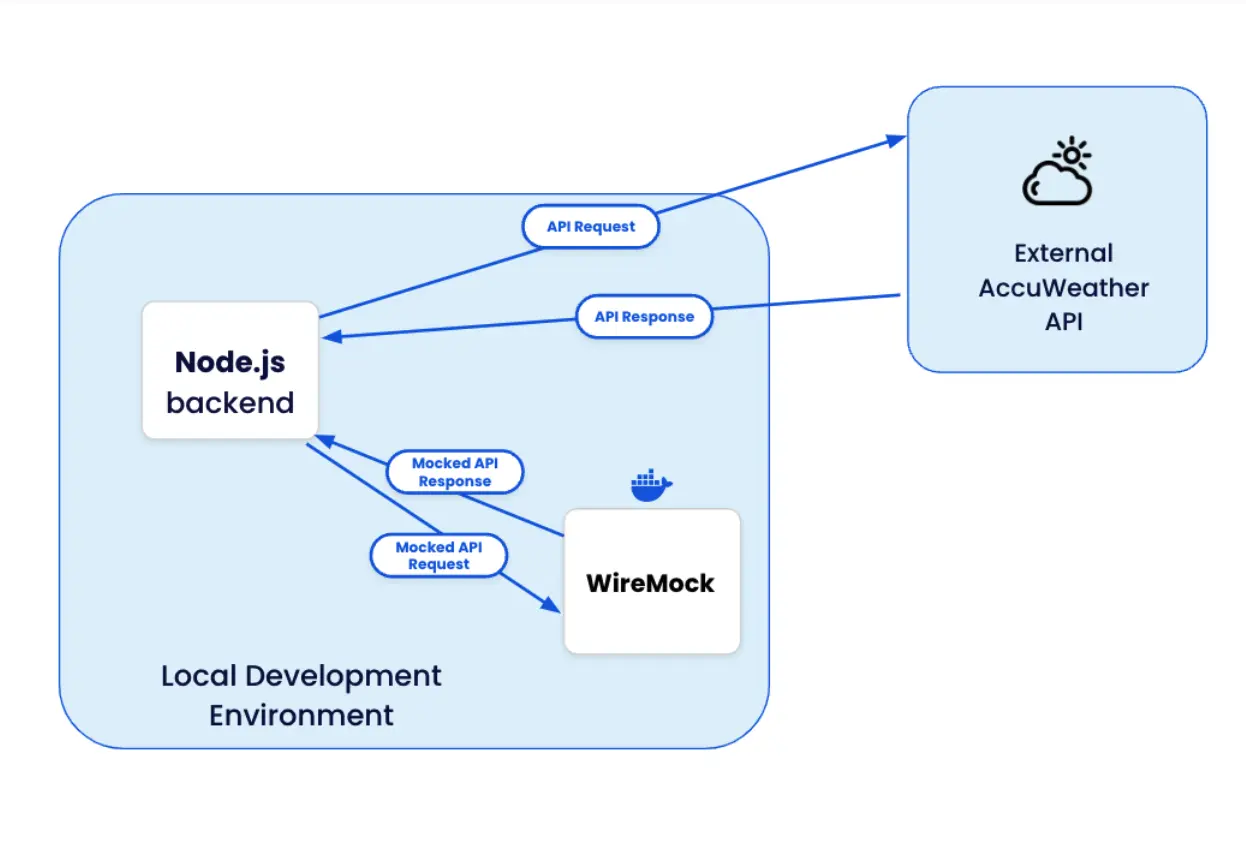
Now that you have tried WireMock, let’s use it in development and testing. In this example, you will use a sample application that has a Node.js backend. This app stack has the following configuration:
- Local Development Environment: The context in which the Node.js backend and WireMock are running.
- Node.js Backend: Represents the backend application that handles HTTP requests.
- External AccuWeather API: The real API from which live weather data is fetched.
- WireMock: The mock server that simulates the API responses during testing. It runs as a Docker container.


- In development, the Node.js backend sends a request to WireMock instead of the actual AccuWeather API.
- In production, it connects directly to the live AccuWeather API for real data.
Use mock data in local development
Let’s set up a Node app to send requests to the WireMock container instead of the actual AccuWeather API.
Prerequisite
- Install Node.js and npm
- Ensure that WireMock container is up and running (see Launching Wiremock
Follow the steps to setup a non-containerized Node application:
-
Navigate to the
accuweather-apidirectoryMake sure you're in the directory where your
package.jsonfile is located. -
Set the environment variable.
Open
.envfile placed underaccuweather-api/directory. Remove the old entries and ensure that it just contains the following single line.API_ENDPOINT_BASE=http://localhost:8080This will tell your Node.js application to use the WireMock server for API calls.
-
Examine the Application Entry Point
- The main file for the application is
index.js, located in theaccuweather-api/src/apidirectory. - This file starts the
getWeather.jsmodule, which is essential for your Node.js application. It uses thedotenvpackage to load environment variables from the.envfile. - Based on the value of
API_ENDPOINT_BASE, the application routes requests either to the WireMock server (http://localhost:8080) or the AccuWeather API. In this setup, it uses the WireMock server. - The code ensures that the
ACCUWEATHER_API_KEYis required only if the application is not using WireMock, enhancing efficiency and avoiding errors.
require("dotenv").config(); const express = require("express"); const axios = require("axios"); const router = express.Router(); const API_ENDPOINT_BASE = process.env.API_ENDPOINT_BASE; const API_KEY = process.env.ACCUWEATHER_API_KEY; console.log('API_ENDPOINT_BASE:', API_ENDPOINT_BASE); // Log after it's defined console.log('ACCUWEATHER_API_KEY is set:', !!API_KEY); // Log boolean instead of actual key if (!API_ENDPOINT_BASE) { throw new Error("API_ENDPOINT_BASE is not defined in environment variables"); } // Only check for API key if not using WireMock if (API_ENDPOINT_BASE !== 'http://localhost:8080' && !API_KEY) { throw new Error("ACCUWEATHER_API_KEY is not defined in environment variables"); } // Function to fetch the location key for the city async function fetchLocationKey(townName) { const { data: locationData } = await axios.get(`${API_ENDPOINT_BASE}/locations/v1/cities/search`, { params: { q: townName, details: false, apikey: API_KEY }, }); return locationData[0]?.Key; } - The main file for the application is
-
Start the Node server
Before you start the Node server, ensure that you have already installed the node packages listed in the package.json file by running
npm install.npm install npm run startYou should see the following output:
> express-api-starter@1.2.0 start
> node src/index.js

API_ENDPOINT_BASE: http://localhost:8080
..
Listening: http://localhost:5001
The output indicates that your Node application has successfully started. Keep this terminal window open.
-
Test the Mocked API
Open a new terminal window and run the following command to test the mocked API:
$ curl "http://localhost:5001/api/v1/getWeather?city=Bengaluru"You should see the following output:
{"city":"Bengaluru","temperature":27.1,"conditions":"Mostly cloudy","forecasts":[{"date":"2024-09-02T07:00:00+05:30","temperature":83,"conditions":"Partly sunny w/ t-storms"},{"date":"2024-09-03T07:00:00+05:30","temperature":83,"conditions":"Thunderstorms"},{"date":"2024-09-04T07:00:00+05:30","temperature":83,"conditions":"Intermittent clouds"},{"date":"2024-09-05T07:00:00+05:30","temperature":82,"conditions":"Dreary"},{"date":"2024-09-06T07:00:00+05:30","temperature":82,"conditions":"Dreary"}]}%This indicates that your Node.js application is now successfully routing requests to the WireMock container and receiving the mocked responses
You might have noticed that you’re trying to use
http://localhost:5001as the URL instead of port8080. This is because your Node.js application is running on port5001, and it's routing requests to the WireMock container that's listening on port8080.Tip
Before you proceed to the next step, ensure that you stop the node application service.
Use a Live API in production to fetch real-time weather data from AccuWeather
To enhance your Node.js application with real-time weather data, you can seamlessly integrate the AccuWeather API. This section of the guide will walk you through the steps involved in setting up a non-containerized Node.js application and fetching weather information directly from the AccuWeather API.
-
Create an AccuWeather API Key
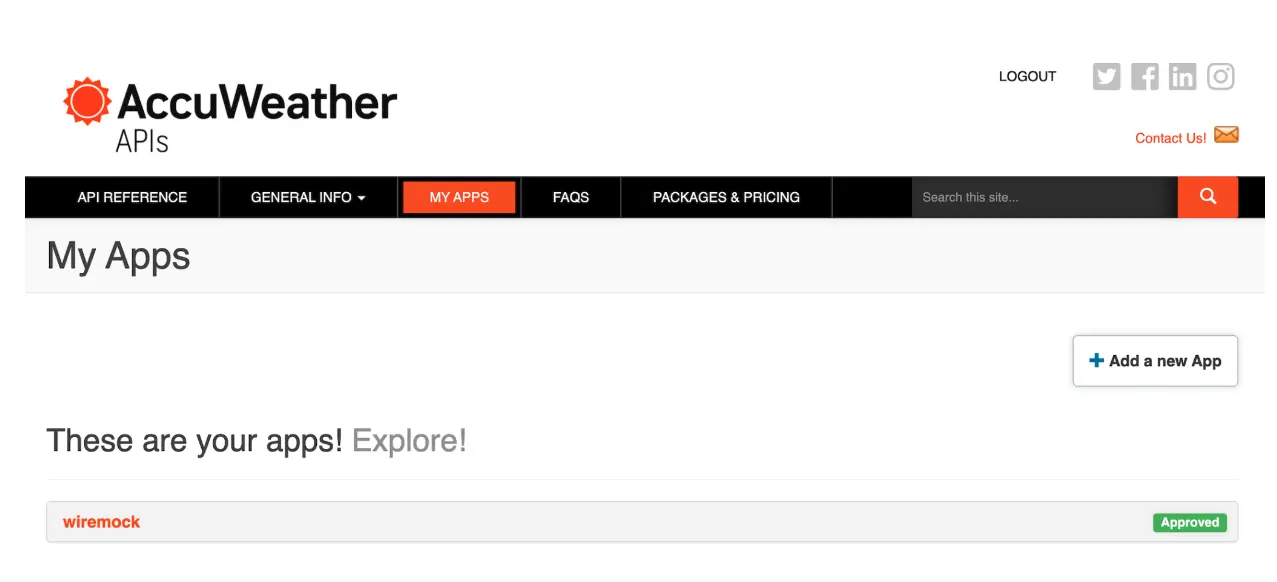
Sign up for a free AccuWeather developer account at https://developer.accuweather.com/. Within your account, create a new app by selecting
MY APPSon the top navigation menu to get your unique API key.

AccuWeather API is a web API that provides real-time weather data and forecasts. Developers can use this API to integrate weather information into their applications, websites, or other projects.
-
Change directory to
accuweather-api$ cd accuweather-api -
Set your AccuWeather API key using the
.envfile:Tip
To prevent conflicts, ensure that any existing environment variables named
API_ENDPOINT_BASEorACCUWEATHER_API_KEYare removed before modifying the.envfile.Run the following command on your terminal:
unset API_ENDPOINT_BASE
unset ACCUWEATHER_API_KEY
It’s time to set the environment variables in the
.envfile:ACCUWEATHER_API_KEY=XXXXXX API_ENDPOINT_BASE=http://dataservice.accuweather.comMake sure to populate
ACCUWEATHER_API_KEYwith the correct value. -
Install the dependencies
Run the following command to install the required packages:
$ npm installThis will install all the packages listed in your
package.jsonfile. These packages are essential for the project to function correctly.If you encounter any warnings related to deprecated packages, you can ignore them for now for this demonstration.
-
Assuming that you don’t have a pre-existing Node server running on your system, go ahead and start the Node server by running the following command:
$ npm run startYou should see the following output:
> express-api-starter@1.2.0 start
> node src/index.js

API_ENDPOINT_BASE: http://dataservice.accuweather.com
ACCUWEATHER_API_KEY is set: true
Listening: http://localhost:5001
Keep this terminal window open.
-
Run the curl command to send a GET request to the server URL.
In the new terminal window, enter the following command:
$ curl "http://localhost:5000/api/v1/getWeather?city=Bengaluru"By running the command, you're essentially telling your local server to provide you with weather data for a city named
Bengaluru. The request is specifically targeting the/api/v1/getWeatherendpoint, and you're providing the query parametercity=Bengaluru. Once you execute the command, the server processes this request, fetches the data and returns it as a response, whichcurlwill display in your terminal.When fetching data from the external AccuWeather API, you're interacting with live data that reflects the latest weather conditions.
Recap
This guide has walked you through setting up WireMock using Docker. You’ve learned how to create stubs to simulate API endpoints, allowing you to develop and test your application without relying on external services. By using WireMock, you can create reliable and consistent test environments, reproduce edge cases, and speed up your development workflow.